Beyond Traditional VPNs: Simplifying Cloud Access with Tailscale
Overview
When we talk about securing access to cloud resources, one of the golden rules is to avoid direct exposure to the Internet. This raises a question for Dev/Ops: How can we , for instance, access a database, a Kubernetes cluster, or a server via SSH without compromising security?
Virtual Private Networks (VPN) offer an answer by establishing a secure link between different elements of a network, regardless of their geographical location. Solutions range from SaaS models to self-hosted platforms, using various protocols, either open-source or proprietary.
Among these options, I wanted to introduce you to Tailscale. This solution uses WireGuard under the hood, known for its simplicity and performance. With Tailscale, you can securely connect devices or servers as if they were on the same local network, even though they are spread across the globe.
🎯 Our target
- Understanding how Tailscale works
- Implementing a secure connection with AWS in a few minutes
- Interacting with an EKS cluster API via a private network
- Accessing services hosted on Kubernetes using the private network.
Throughout this article, you will obviously need to create a Tailscale account. It's worth noting that authentication is delegated to third-party identity providers (e.g., Okta, OneLogin, Google).
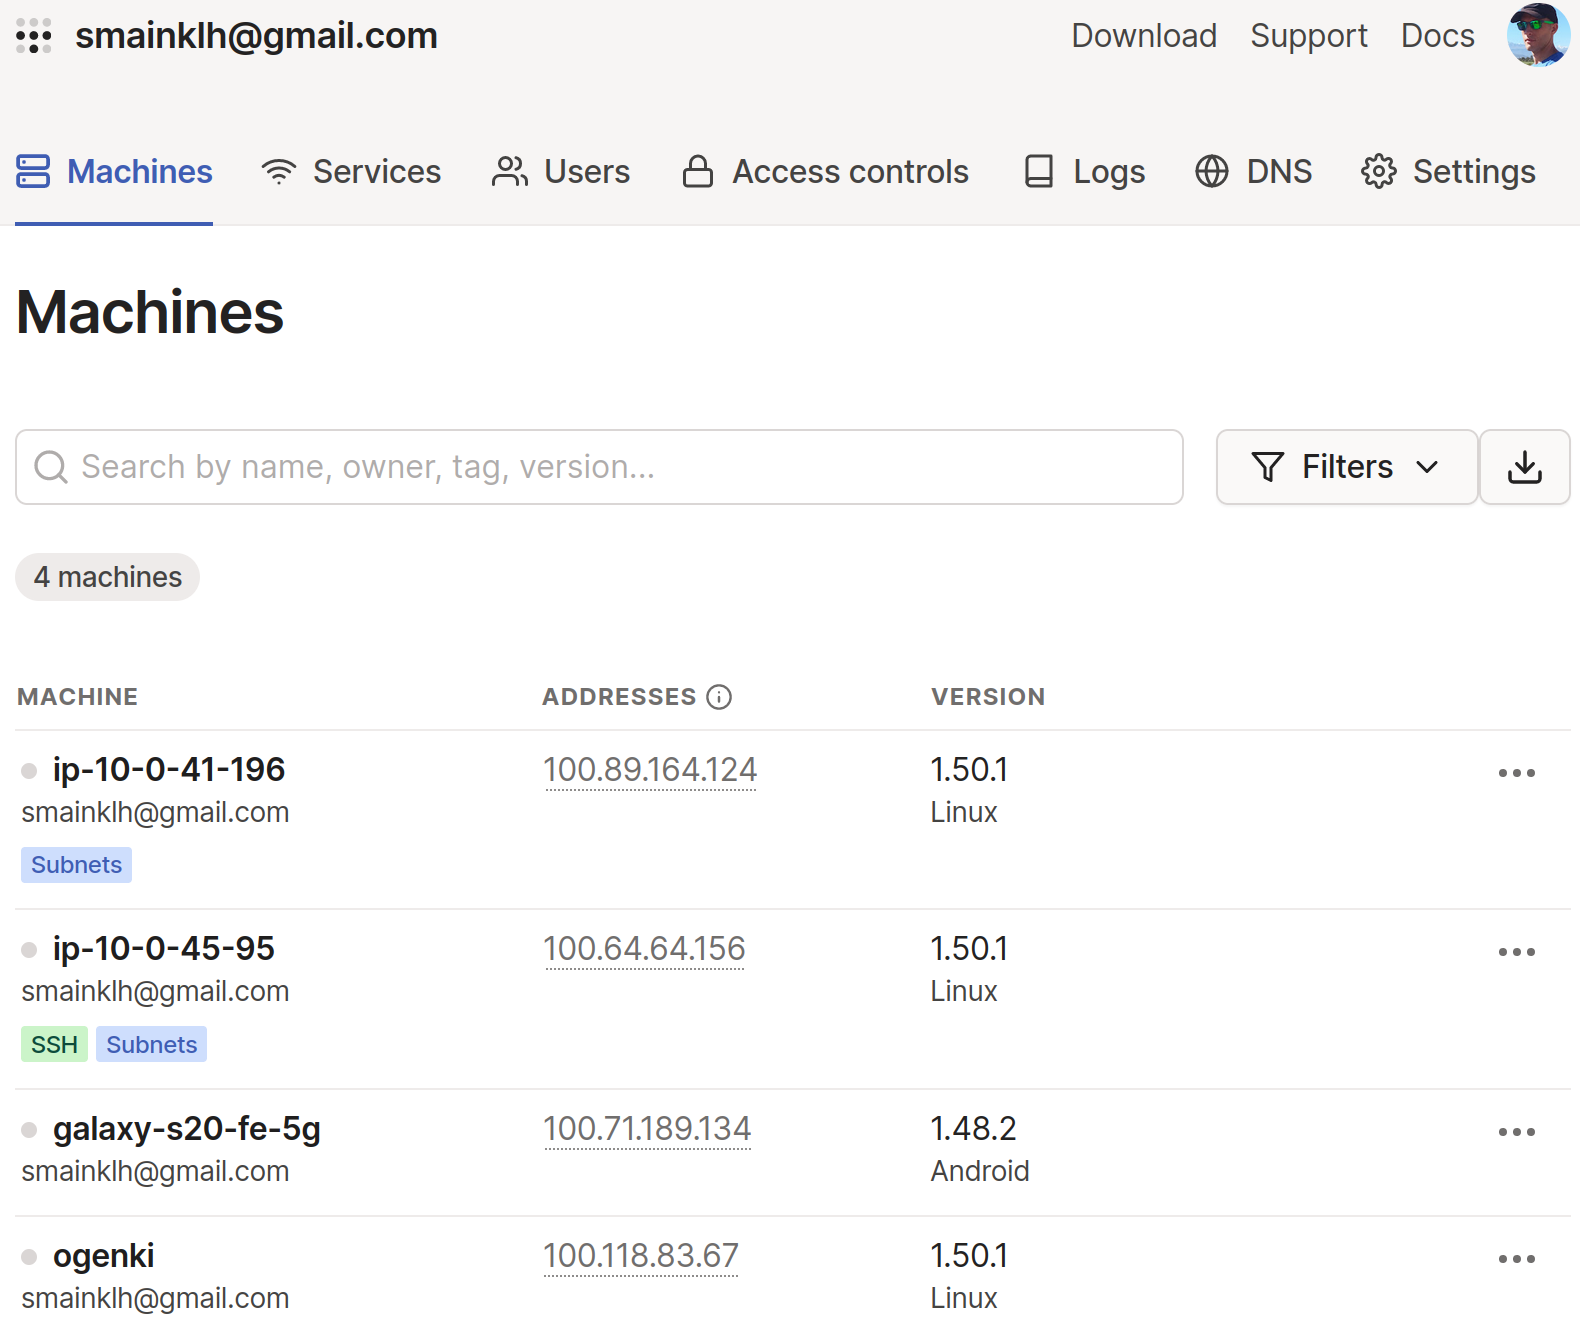
Once the account is created, you'll have instant access to the management console. It allows you to list connected devices, visualize logs, and change most of the settings.
💡 Under the Hood
Mesh VPN: A mesh VPN refers to a VPN network configuration in which every node (i.e., each device or machine) connects directly to every other node, creating a mesh-like structure. This stands in contrast to traditional VPN configurations that usually adopt a "hub and spoke" topology, where multiple clients connect to one central server.
Zero Trust: This approach operates on the principle that every access request to a network is inherently untrusted. Whether an application or user, identity must be proven and authorization given before accessing a resource. Trust isn't assumed based solely on originating from an internal network or a specific geographic location.
Tailnet: When you first use Tailscale, a Tailnet is automatically generated for you, representing your personal private network. Every device within this tailnet is assigned a unique Tailscale IP.
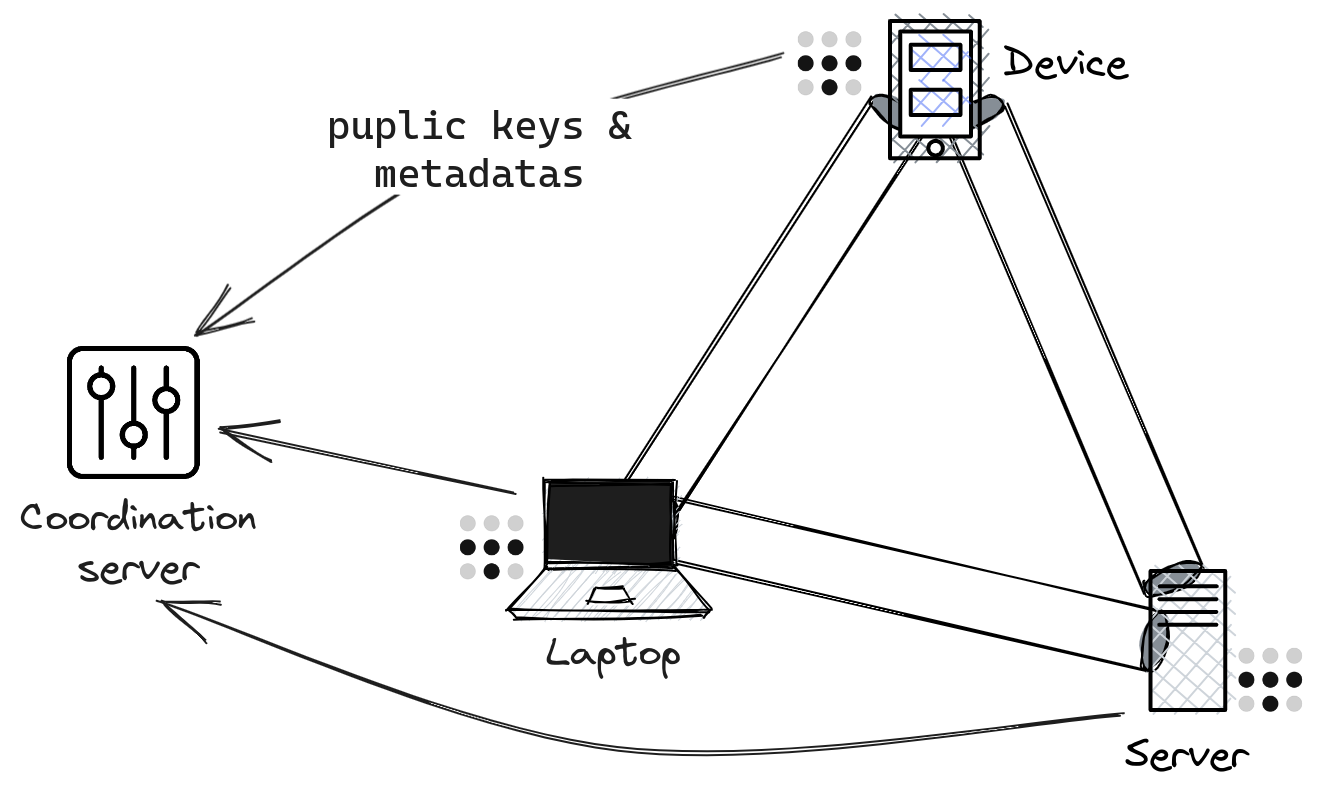
Tailscale's architecture clearly distinguishes between the Control plane and the Data plane:
The coordination server primarily manages the exchange of metadata and public keys among all Tailnet members. Importantly, by Tailscale's design, only the public key is shared, with the private key securely retained on its originating node.
The nodes in the Tailnet establish a mesh network: Instead of passing data through the coordination server, these nodes communicate directly in a peer-to-peer manner. Each node has a unique identity, allowing it to authenticate and become part of the Tailnet.
📥 Client Installation
Most platforms are supported, and the installation options are listed here. As for me, I am on Archlinux:
1sudo pacman -S tailscale
It's possible to start the service automatically upon machine startup.
1sudo systemctl enable --now tailscaled
To register your personal computer, run the following command:
1sudo tailscale up --accept-routes
2
3To authenticate, visit:
4
5        https://login.tailscale.com/a/f50...
ℹ️ The --accept-routes option is required on Linux in order to configure the routes announced by Subnet routers. We'll delve deeper into this later on in this post.
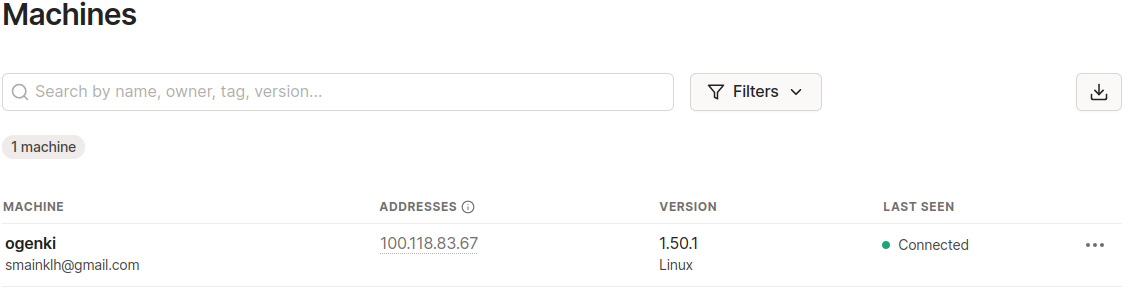
Ensure that you've indeed acquired an IP from the Tailscale network:
1tailscale ip -4
2100.118.83.67
3
4tailscale status
5100.118.83.67   ogenki               smainklh@    linux   -
ℹ️ For Linux users, ensure that Tailscale works well with your DNS configuration: Follow this documentation.
All the steps performed in this article come from this git repository.
It will allow you to create all the components aiming to set up an EKS Lab cluster, following a previous blog post on Cilium and Gateway API.
☁️ Accessing AWS Privately

To securely access all resources available on AWS, one can deploy a Subnet router.
A Subnet router is a Tailscale instance that provides access to subnets not directly linked to Tailscale. It acts as a bridge between Tailscale's virtual private network (Tailnet) and other local networks.
We can then reach Cloud subnets through Tailscale's VPN.
⚠️ To do so, on AWS, you'll need to configure the security groups appropriately to allow Subnet routers.
🚀 Deploying a Subnet Router
Let's dive in and deploy a Subnet router on an AWS network!Everything is done using the Terraform code present in the directory opentofu/network. We will analyze the Tailscale-specific configuration present in the tailscale.tf file before deploying.
The Terraform provider
You can configure several settings via the API Tailscale using the Terraform provider. First, you need to generate an API key 🔑 from the admin console:
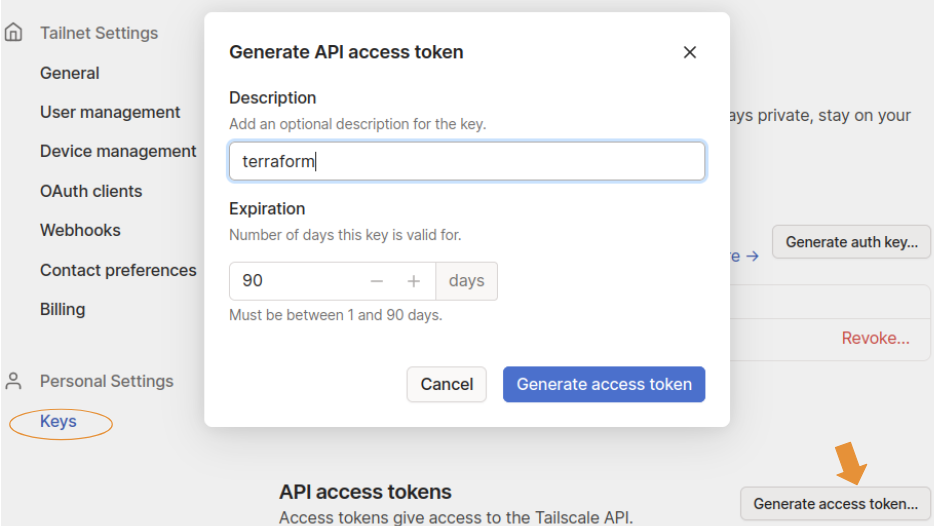
You should keep this key in a secure store as it is used to deploy the Subnet router.
1provider "tailscale" {
2  api_key = var.tailscale.api_key
3  tailnet = var.tailscale.tailnet
4}
The ACL's
Access Control Lists allow you to define who is authorized to communicate with whom (user or device). Upon account creation, they are very permissive, and there are no restrictions (everyone can communicate with everyone).
 1resource "tailscale_acl" "this" {
 2  acl = jsonencode({
 3    acls = [
 4      {
 5        action = "accept"
 6        src    = ["*"]
 7        dst    = ["*:*"]
 8      }
 9    ]
10...
11}
For my Lab environment, I kept this default configuration because I'm the only person accessing it. Furthermore, the only devices connected to my Tailnet are my laptop and the Subnet router. However, in a corporate setting, you need to think this through. It's then possible to define a security policy based on groups of people or node tags.
Check out this doc for more info.
Domain Names
There are various ways to manage DNS with Tailscale:
Magic DNS: When a device joins the Tailnet, it registers with a name, and this can be immediately used to communicate with the device.
1tailscale status
2100.118.83.67   ogenki               smainklh@    linux   -
3100.115.31.152  ip-10-0-43-98        smainklh@    linux   active; relay "par", tx 3044 rx 2588
4
5ping ip-10-0-43-98
6PING ip-10-0-43-98.tail9c382.ts.net (100.115.31.152) 56(84) bytes of data.
764 bytes from ip-10-0-43-98.tail9c382.ts.net (100.115.31.152): icmp_seq=1 ttl=64 time=11.4 ms
AWS: To use AWS internal domain names, you can utilize the second IP of the VPC, which always corresponds to the DNS server (In our case it would be 10.0.0.2). This enables the use of potential private zones on route53 or connection to resources using domain names.
The simplest configuration is thus to declare the list of DNS servers to use and add the AWS one. Here's an example with Cloudflare's public DNS.
1resource "tailscale_dns_nameservers" "this" {
2  nameservers = [
3    "1.1.1.1",
4    cidrhost(module.vpc.vpc_cidr_block, 2)
5  ]
6}
The Authentication Key
For a device to join the Tailnet at startup, Tailscale must be started using an authentication key. It is generated as follows:
1resource "tailscale_tailnet_key" "this" {
2  reusable      = true
3  ephemeral     = false
4  preauthorized = true
5}
reusable: As we're using anautoscaling groupwhich can be composed of multiple instances, this key should be reusable multiple times.ephemeral: For this demo, we have created a non-expiring key. In a production environment, enabling expiration would be preferable.preauthorized: This key needs to be valid and preauthorized so that the instance can automatically join Tailscale.
The generated key is then used to launch tailscale with the --auth-key parameter.
1sudo tailscale up --authkey=<REDACTED>
Announcing Routes for AWS subnets
It's also necessary to announce the network that we wish to route through the Subnet router. In our example, we choose to route the entire VPC network with the CIDR 10.0.0.0/16.
To automate this process, an autoApprovers rule needs to be added. This indicates that the routes announced by the user smainklh@gmail.com are authorized without requiring an approval step.
1    autoApprovers = {
2      routes = {
3        "10.0.0.0/16" = ["smainklh@gmail.com"]
4      }
5    }
Here is the Taiscale command run in the Subnet router:
1sudo tailscale up --authkey=<REDACTED> --advertise-routes="10.0.0.0/16"
The Terraform Module
I've created a module that is straightforward and allows deploying an autoscaling group on AWS and configuring Tailscale. Upon the instance's startup, it will authenticate using an auth_key and announce the specified networks. In the example below, the instance announces the CIDR of the VPC on AWS.
 1module "tailscale_subnet_router" {
 2  source  = "Smana/tailscale-subnet-router/aws"
 3  version = "1.0.4"
 4
 5  region = var.region
 6  env    = var.env
 7
 8  name     = var.tailscale.subnet_router_name
 9  auth_key = tailscale_tailnet_key.this.key
10
11  vpc_id                = module.vpc.vpc_id
12  subnet_ids            = module.vpc.private_subnets
13  advertise_routes      = [module.vpc.vpc_cidr_block]
14...
15}
Now that we've examined the various parameters, it's time to start our Subnet router 🚀 !!
First, you need to create a variable.tfvars file in the opentofu/network directory.
 1env                 = "dev"
 2region              = "eu-west-3"
 3private_domain_name = "priv.cloud.ogenki.io"
 4
 5tailscale = {
 6  subnet_router_name = "ogenki"
 7  tailnet            = "smainklh@gmail.com"
 8  api_key            = "tskey-api-..."
 9}
10
11tags = {
12  project = "demo-cloud-native-ref"
13  owner   = "Smana"
14}
Then run the following command:
1tofu plan --var-file variables.tfvars
After checking the plan, apply the changes as follows
1tofu apply --var-file variables.tfvars
When the instance starts up, it will appear in the list of devices on the Tailnet.
1tailscale status
2100.118.83.67   ogenki               smainklh@    linux   -
3100.68.109.138  ip-10-0-26-99        smainklh@    linux   active; relay "par", tx 33868 rx 32292
We can also check that the route is correctly announced as follows:
1tailscale status --json|jq '.Peer[] | select(.HostName == "ip-10-0-26-99") .PrimaryRoutes'
2[
3  "10.0.0.0/16"
4]
⚠️ For security reasons, do not forget to delete the variables.tfvars file as it contains the API key.
👏 That's it! We are now able to access the network on AWS, provided we've also set up the filtering rules, such as ACLs and security groups. For instance, we can access a database from the workstation.
1psql -h demo-tailscale.cymnaynfchjt.eu-west-3.rds.amazonaws.com -U postgres
2Password for user postgres:
3psql (15.4, server 15.3)
4SSL connection (protocol: TLSv1.2, cipher: ECDHE-RSA-AES256-GCM-SHA384, compression: off)
5Type "help" for help.
6
7postgres=>
💻 A Different Way to SSH
Traditionally, we often connect to servers using the SSH protocol. This involves generating a private key and distributing the corresponding public key to remote servers.
Unlike traditional SSH key usage, Tailscale uses Wireguard for authentication and encrypted connections, eliminating the need to re-authenticate the client. Furthermore, Tailscale handles the distribution of SSH host keys. Through ACL rules, user access can be revoked without the need to delete SSH keys. There's also a mode that can be activated to enhance security by requiring periodic re-authentication. It's evident that Tailscale SSH simplifies authentication, streamlines SSH connection management, and enhance security levels.
To achieve this, one must also initiate Tailscale with the --ssh option. Permissions for SSH are managed at the ACL level as follows:
 1...
 2    ssh = [
 3      {
 4        action = "check"
 5        src    = ["autogroup:member"]
 6        dst    = ["autogroup:self"]
 7        users  = ["autogroup:nonroot"]
 8      }
 9    ]
10...
The rule mentioned above allows all users to access their own devices via SSH. When trying to connect, they must use a user account other than root. Each connection attempt mandates an additional authentication (action=check). This authentication is carried out by visiting a specific web link.
1ssh ubuntu@ip-10-0-26-99
2...
3# Tailscale SSH requires an additional check.
4# To authenticate, visit: https://login.tailscale.com/a/f1f09a548cc6
5...
6ubuntu@ip-10-0-26-99:~$
Access logs to the machine can be viewed using journalctl.
1ubuntu@ip-10-0-26-99:~$ journalctl -aeu tailscaled|grep ssh
2Oct 15 15:51:34 ip-10-0-26-99 tailscaled[1768]: ssh-conn-20231015T155130-00ede660b8: handling conn: 100.118.83.67:55098->ubuntu@100.68.109.138:22
3Oct 15 15:51:56 ip-10-0-26-99 tailscaled[1768]: ssh-conn-20231015T155156-b6d1dc28c0: handling conn: 100.118.83.67:44560->ubuntu@100.68.109.138:22
4Oct 15 15:52:52 ip-10-0-26-99 tailscaled[1768]: ssh-conn-20231015T155156-b6d1dc28c0: starting session: sess-20231015T155252-5b2acc170e
5Oct 15 15:52:52 ip-10-0-26-99 tailscaled[1768]: ssh-session(sess-20231015T155252-5b2acc170e): handling new SSH connection from smainklh@gmail.com (100.118.83.67) to ssh-user "ubuntu"
6Oct 15 15:52:52 ip-10-0-26-99 tailscaled[1768]: ssh-session(sess-20231015T155252-5b2acc170e): access granted to smainklh@gmail.com as ssh-user "ubuntu"
7Oct 15 15:52:52 ip-10-0-26-99 tailscaled[1768]: ssh-session(sess-20231015T155252-5b2acc170e): starting pty command: [/usr/sbin/tailscaled be-child ssh --uid=1000 --gid=1000 --groups=1000,4,20,24,25,27,29,30,44,46,115,116 --local-user=ubuntu --remote-user=smainklh@gmail.com --remote-ip=100.118.83.67 --has-tty=true --tty-name=pts/0 --shell --login-cmd=/usr/bin/login --cmd=/bin/bash -- -l]
ℹ️ With Tailscale SSH, you can SSH into a device no matter where it's located. However, in a 100% AWS context, one would likely prefer using AWS SSM.
💾 In security, retaining logs for future reference is vital. There are various types of logs:
Audit Logs: These provide insights into who did what. They can be accessed through the admin console and can also be forwarded to a SIEM.
Device Logs: Specific commands to each device can be used to view these, such as (journalctl -u tailscaled on Linux).
Network Logs: These are useful for visualizing the connections between devices.
☸ What About Kubernetes?
In the context of Kubernetes, there are several options for accessing a Service:
- Proxy: This method involves an additional pod that forwards calls to an existing Service.
- Sidecar: This allows a pod to connect to the Tailnet. As a result, end-to-end connectivity is established, making bi-directional communication possible (from the pod to the Tailnet nodes).
- Operator: This approach facilitates exposing Kubernetes services and the API (
ingress) and permits pods to access Tailnet nodes (egress). Configuration is achieved by modifying existing resources: Services and Ingresses.
In our setup, we already have a Subnet router that routes the entire VPC network. As such, it's sufficient for our service to be exposed via a private IP.
The Kubernetes API
To access the Kubernetes API, it's essential to authorize the Subnet router. This is accomplished by setting the following rule for the source security group.
 1module "eks" {
 2...
 3  cluster_security_group_additional_rules = {
 4    ingress_source_security_group_id = {
 5      description              = "Ingress from the Tailscale security group to the API server"
 6      protocol                 = "tcp"
 7      from_port                = 443
 8      to_port                  = 443
 9      type                     = "ingress"
10      source_security_group_id = data.aws_security_group.tailscale.id
11    }
12  }
13...
14}
Let's ensure that the API is indeed accessible on a private IP.
 1CLUSTER_URL=$(TERM=dumb kubectl cluster-info | grep "Kubernetes control plane" | awk '{print $NF}')
 2
 3curl -s -o /dev/null -w '%{remote_ip}\n' ${CLUSTER_URL}
 410.228.244.167
 5
 6kubectl get ns
 7NAME                STATUS   AGE
 8cilium-secrets      Active   5m46s
 9crossplane-system   Active   4m1s
10default             Active   23m
11flux-system         Active   5m29s
12infrastructure      Active   4m1s
13...
Accessing Kubernetes Services Privately
An exposed Kubernetes Service is just another AWS network resource 😉. We simply need to ensure that this service uses a private IP.
In my example, I'm using the Gateway API to configure Clouder's load balancing, and I encourage you to read my previous article on the subject.
All that's needed is to create an internal NLB, ensuring that the Service has the annotation service.beta.kubernetes.io/aws-load-balancer-scheme set to internal. With Cilium Gateway API, this is achieved via the Kyverno clusterPolicy.
1          metadata:
2            annotations:
3              external-dns.alpha.kubernetes.io/hostname: gitops-${cluster_name}.priv.${domain_name},grafana-${cluster_name}.priv.${domain_name}
4              service.beta.kubernetes.io/aws-load-balancer-scheme: "internal"
5              service.beta.kubernetes.io/aws-load-balancer-backend-protocol: tcp
6          spec:
7            loadBalancerClass: service.k8s.aws/nlb
However, there's an additional prerequisite since we can't use Let's Encrypt for private DNS zones. I've thus generated an internal PKI that produces self-signed certificates with Cert-manager.
In this post, I won't delve into the details of the EKS cluster deployment or the configuration of Flux. Once the cluster is created and all the Kubernetes resources have been reconciled, we have a service that is exposed via an internal AWS LoadBalancer.
1NLB_DOMAIN=$(kubectl get svc -n infrastructure cilium-gateway-platform -o jsonpath={.status.loadBalancer.ingress[0].hostname})
2dig +short ${NLB_DOMAIN}
310.0.33.5
410.0.26.228
510.0.9.183
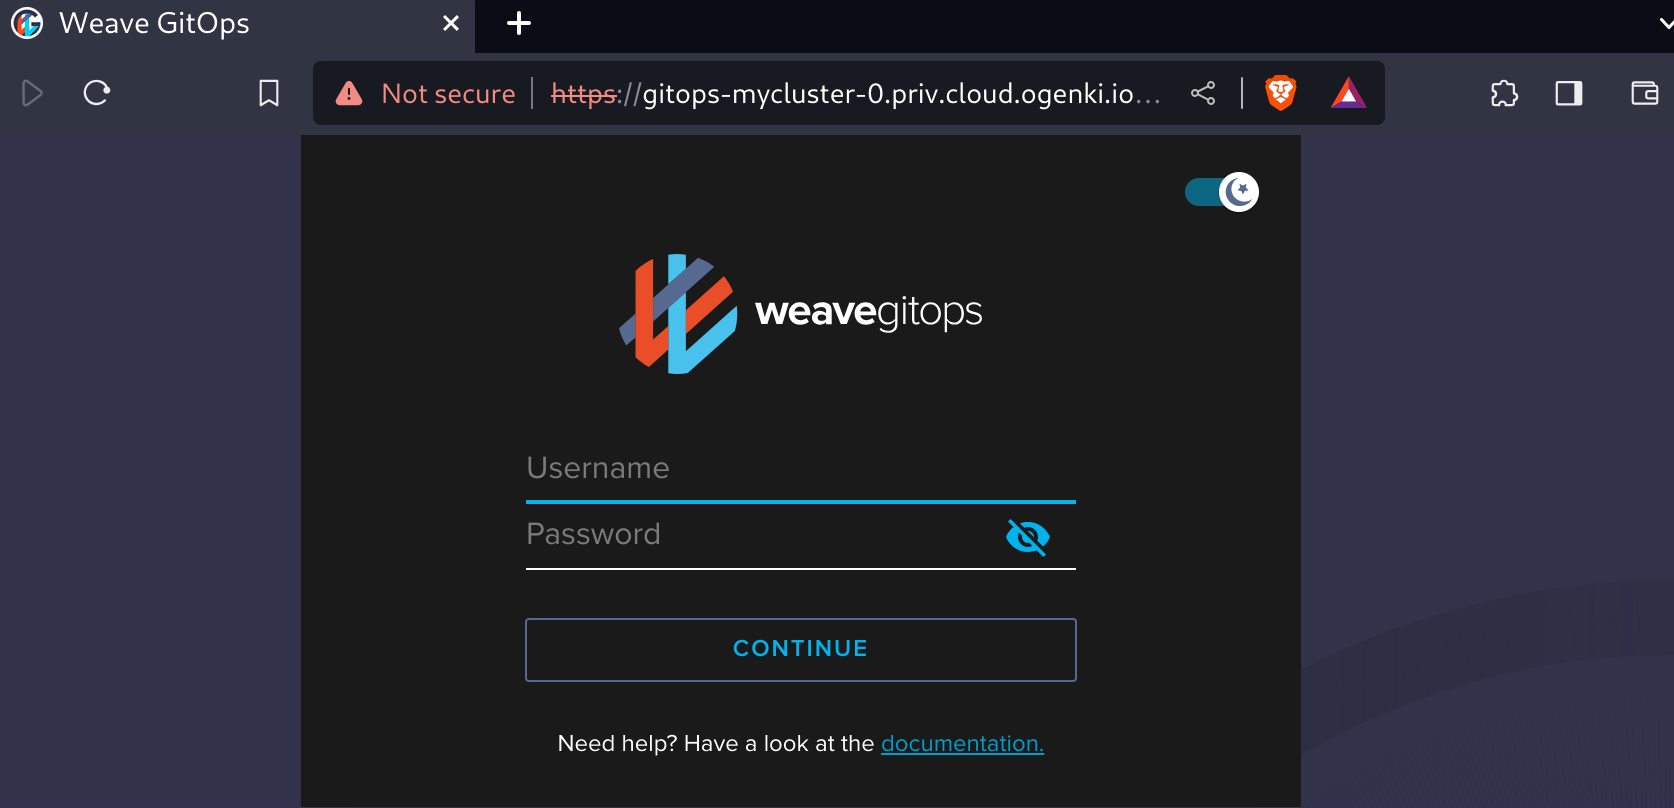
An DNS record is also automatically created for the exposed services, allowing us to access privately through the Flux web interface.
1dig +short gitops-mycluster-0.priv.cloud.ogenki.io
210.0.9.183
310.0.26.228
410.0.33.5
💭 Final Thoughts
Some time ago, in a professional context, I implemented Cloudflare Zero Trust. I've noticed here that Tailscale shares many similarities with this solution. Of course, there are other solutions like Teleport, and the choice of a solution for private access to one's infrastructure depends on the context and security goals.
For me, I was particularly convinced by the simplicity of Tailscale's implementation, perfectly meeting my need to access the Clouder network.
Part of Tailscale's code is open source, especially the client which is under the BSD 3-Clause license. The proprietary part mainly concerns the coordination platform. It's worth noting that there's an open-source alternative named Headscale. This is a distinct initiative with no connection to the Tailscale company.
For personal use, Tailscale is quite generous, offering free access for up to 100 devices and 3 users. That said, Tailscale is a serious option to consider for businesses, and in my opinion, it's essential to support companies that have a clear open-source policy and a quality product.